I love the autumn atmosphere, the colours, the falling leaves, and the pumpkins that make their way into our homes. Today, I am offering a tutorial on how to sew a stuffed pumpkin plush, which makes perfect Halloween or seasonal decorations. And because there are lots of different types of pumpkins out there, we are going to learn to make two different shapes: one round and one hexagonal. This DIY project is suitable for beginners, very easy to make, and requires very few supplies. You can use a sewing machine or make it entirely by hand if you do not have one. Here below, you will find the supplies list and the free downloadable pattern in A4 format.
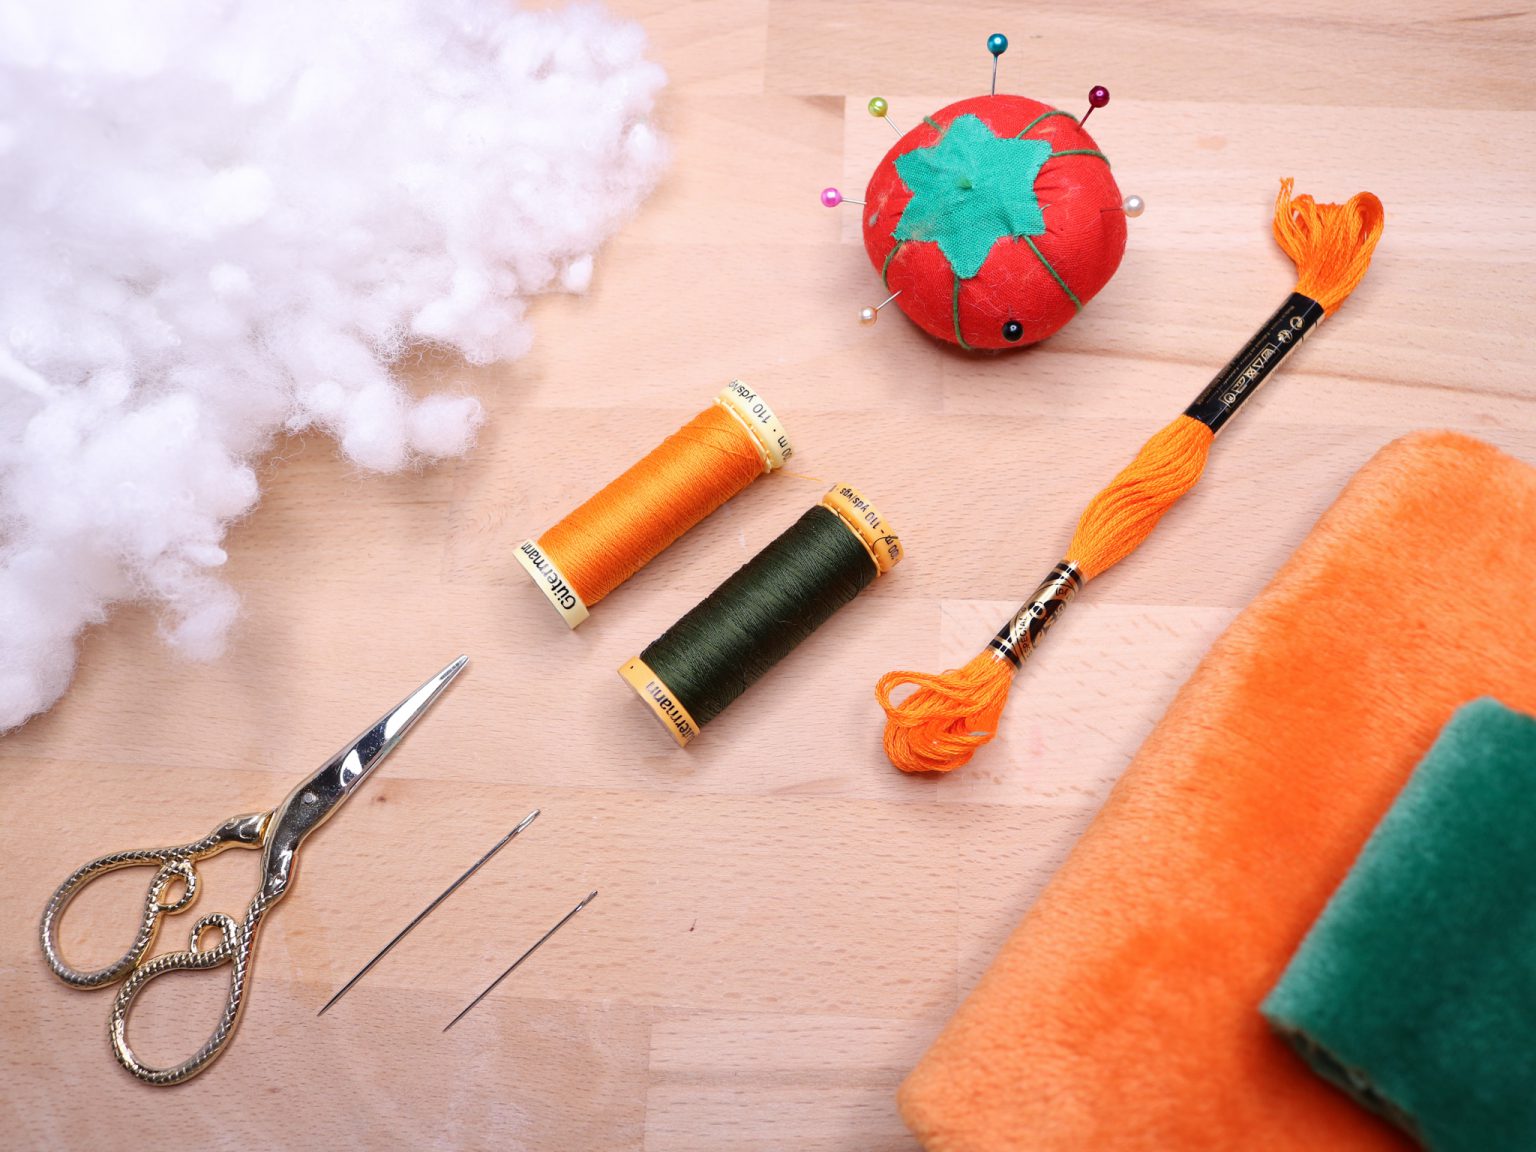
SUPPLIES LIST
- Faux fur <5mm:
Bright orange.
Dark green.
- Stuffing fibre: White polyester “Soft Flocks”.
- Embroidery and sewing needle.
- Sewing thread (orange + dark green): DMC
- Embroidery thread (orange): DMC
- Pins and a pair of scissors.
- Faux fur <5mm: Bright orange. Dark green.
- Stuffing fibre: White polyester “Soft Flocks”.
- Embroidery and sewing needle.
- Sewing thread (orange + dark green): DMC
- Embroidery thread (orange): DMC
- Pins and a pair of scissors.
PART I
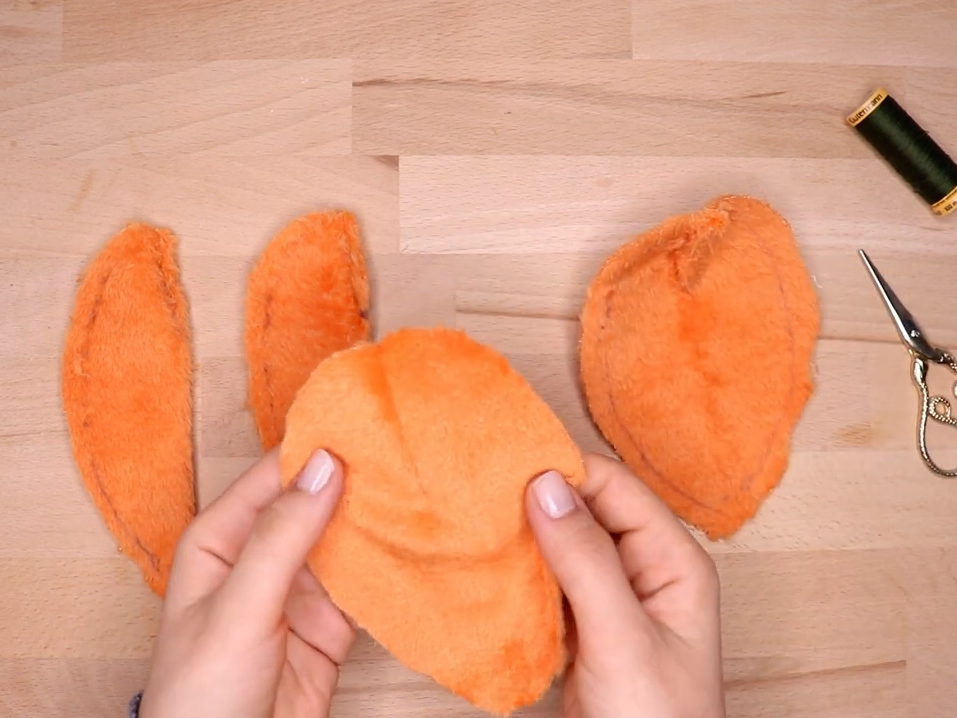
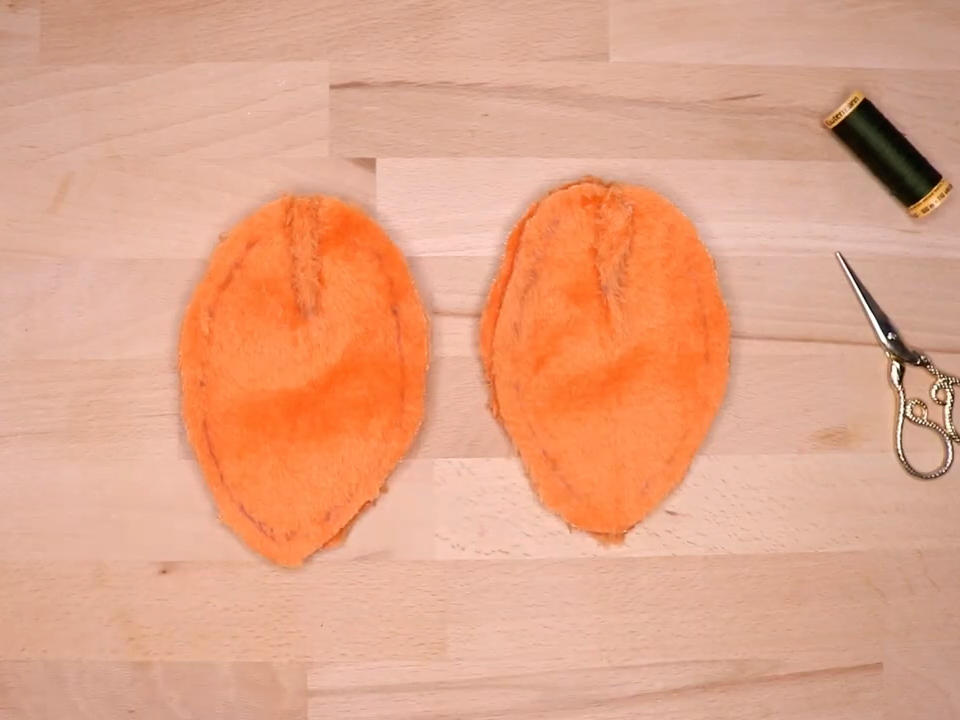
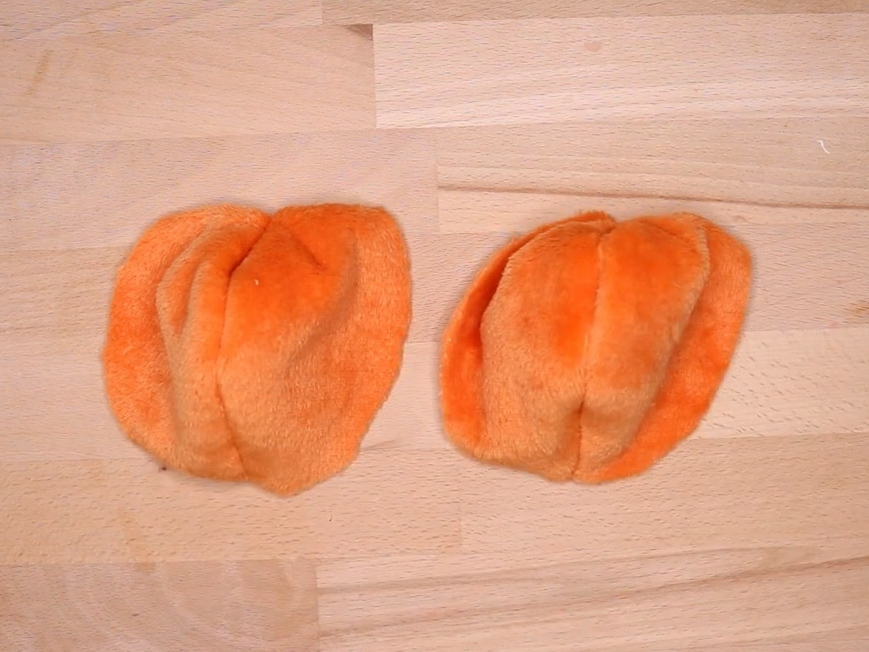
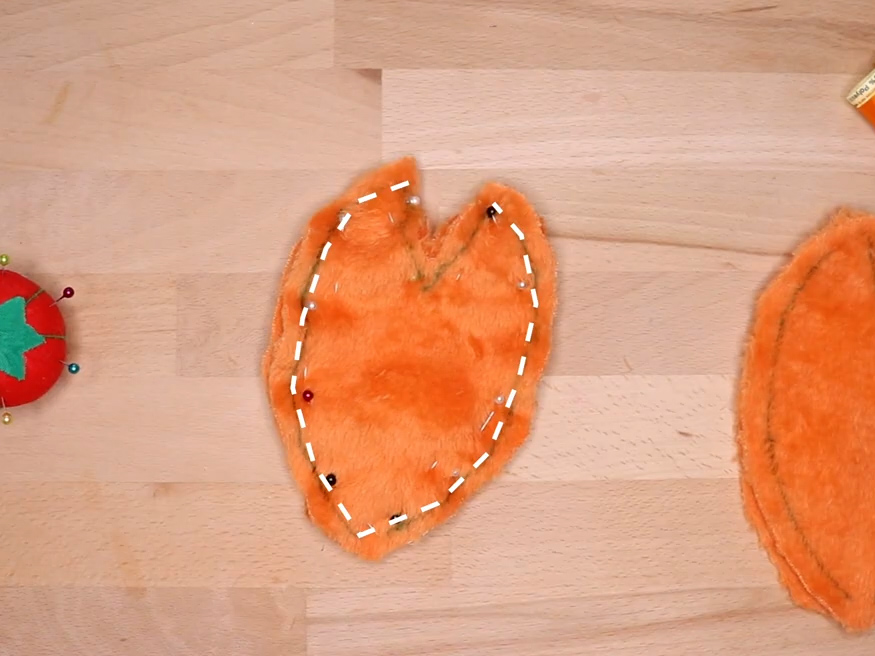
If possible, start by putting the fabric in a washing machine, so that fur fabrics will shed less when you work with them. Transfer the pattern on the backside of the fabric (image 1) and trace four identical pieces in the orange faux fur (image 2). Then, cut the outline, leaving at least a 1-centimetre seam allowance. Fold each piece in half and sew the openings on the back, following the dotted line (image 3). You should end up with four leaf-shaped pieces (image 4).
Click on the pictures to show them in full size.


PART II
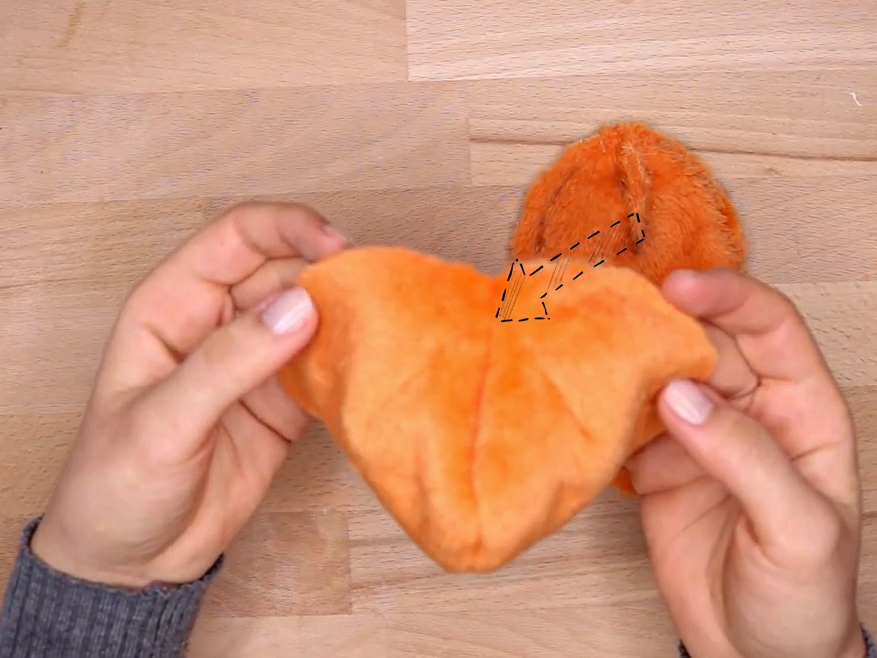
Lay two pieces against one another, fur against fur (image 1), and pin the entire outline before sewing along the dotted line (image 2). Align the seams carefully, as indicated by the arrow on image 3. Repeat the same steps with the two remaining pieces, and the two parts of your pumpkin will be ready (image 4).

PART III
Lay the two sewn pieces against one another, right sides facing (image 1 & 2), then pin them to hold them in place. Sew along the dotted line, leaving the top open (image 3). Make sure that the bottom seams connect correctly. The body of the pumpkin is done (image 4)!


PART IV
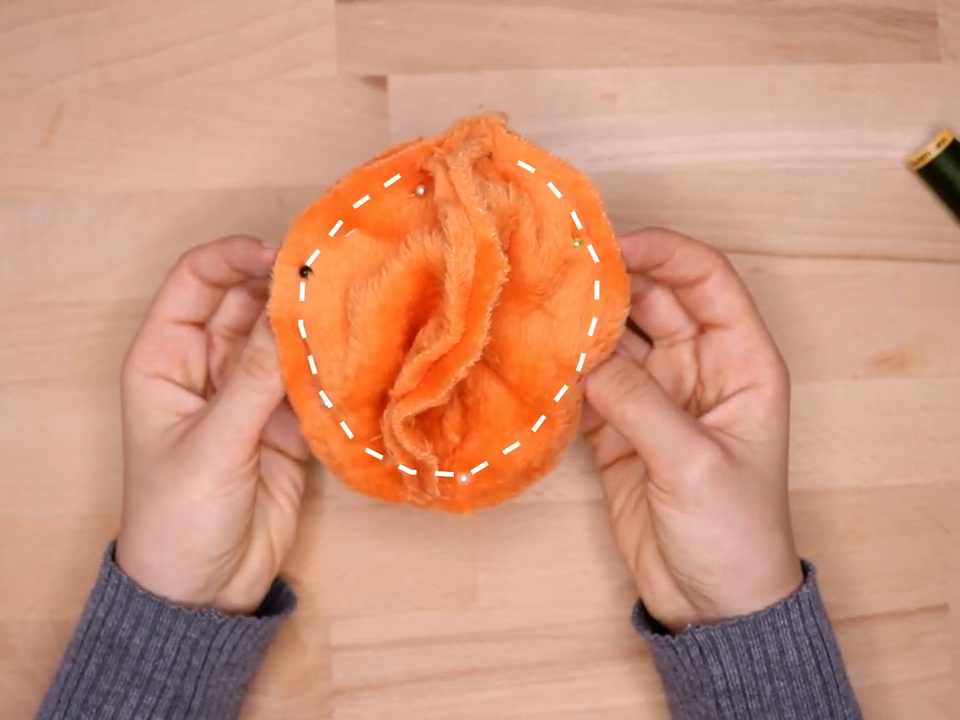
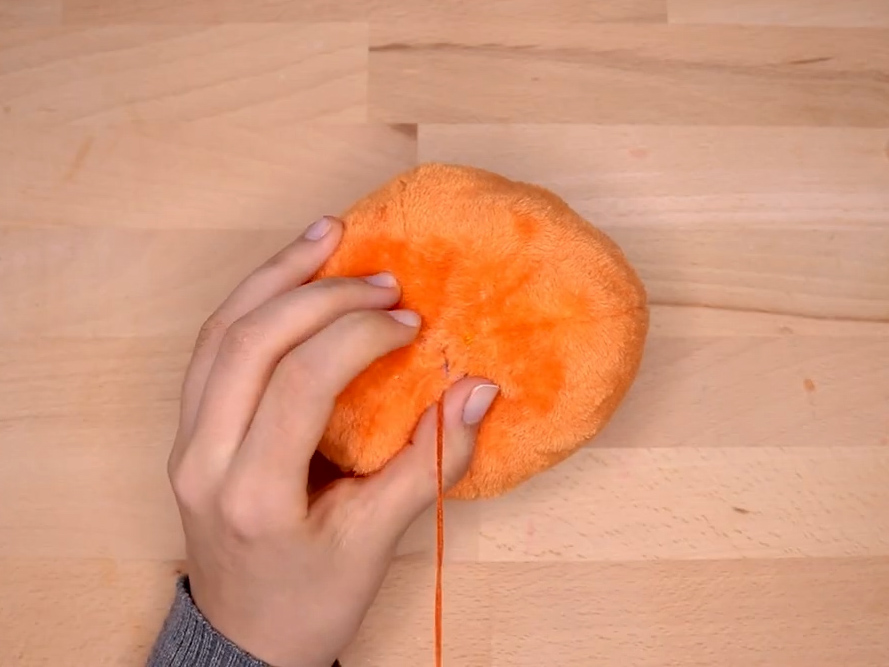
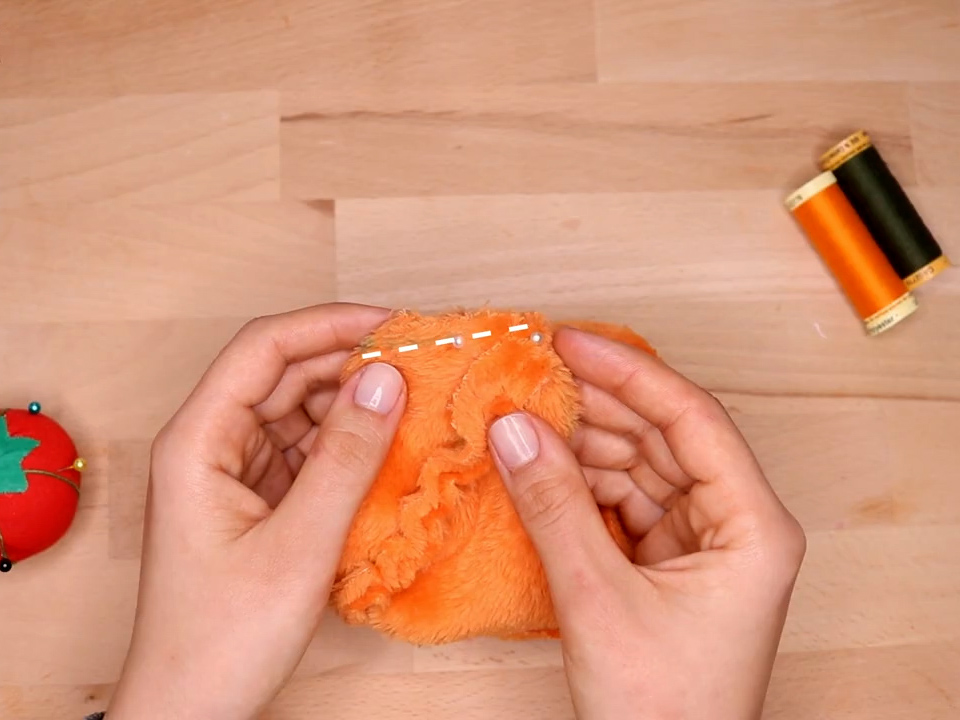
You can now stuff the pumpkin (image 1). Start by turning it right-side out. With a needle and an orange embroidery thread (because it is stronger than a sewing thread for this step), sew all around the opening with a running stitch (image n°2 + 3). Start from the inside to hide the first knot in the pumpkin. Now all you have to do is to pull the thread to close the opening, tie a strong knot and cut the rest of the thread with scissors (image n°4).


PART V
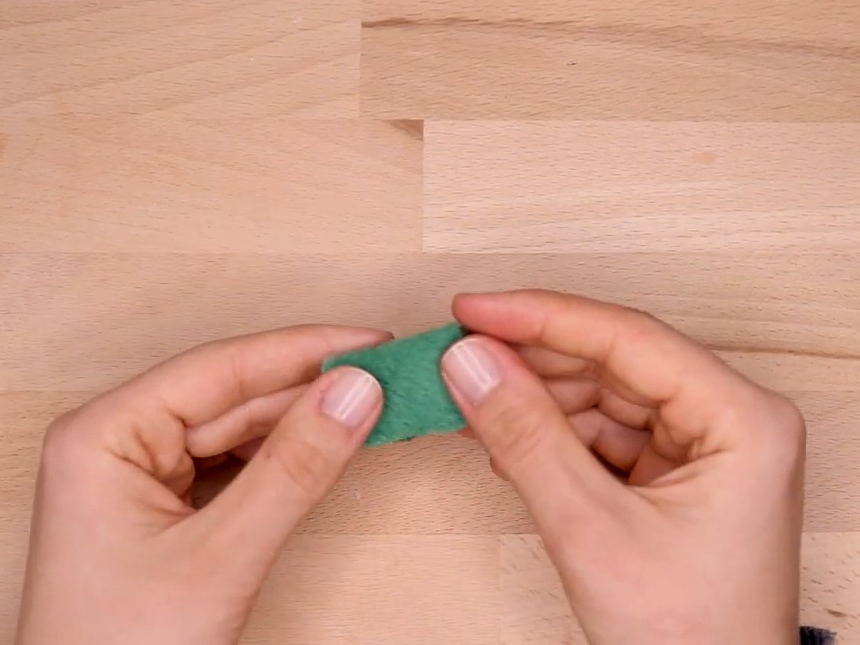
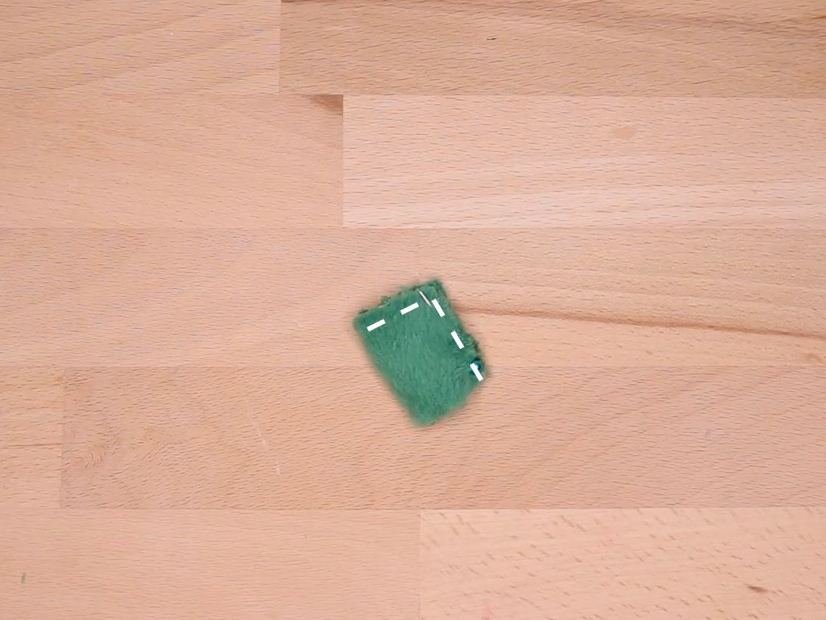
It is now time to make the stem, which is the easiest part. Cut a small piece of green fabric, fold it (image 2), and sew it on the backside, along the dotted line (image 3). Lastly, turn the stem right-side out (image 4).


PART VI
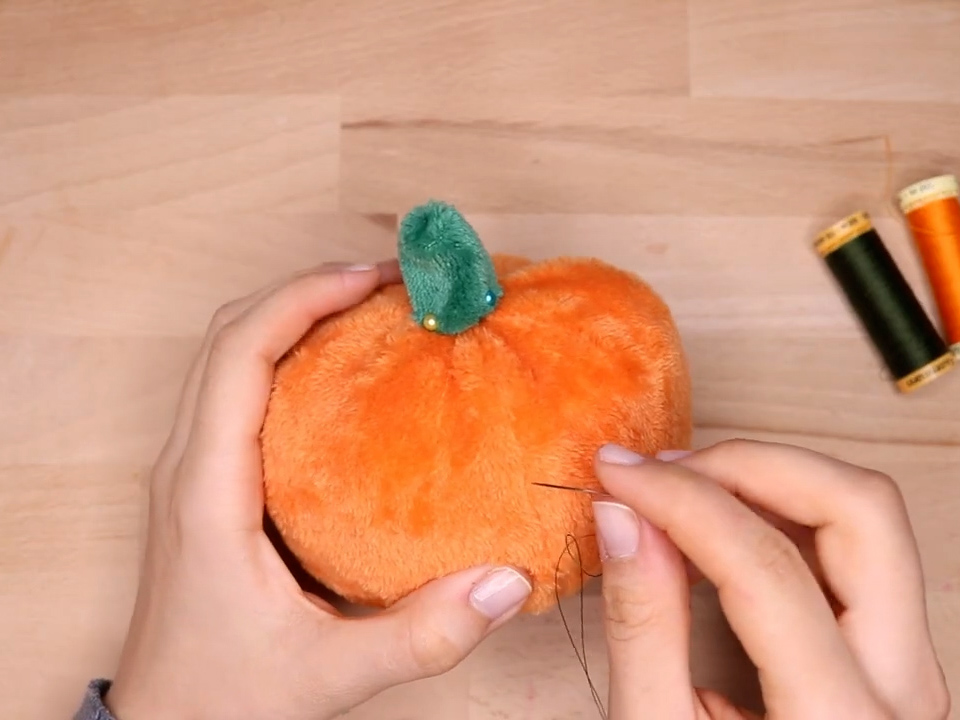
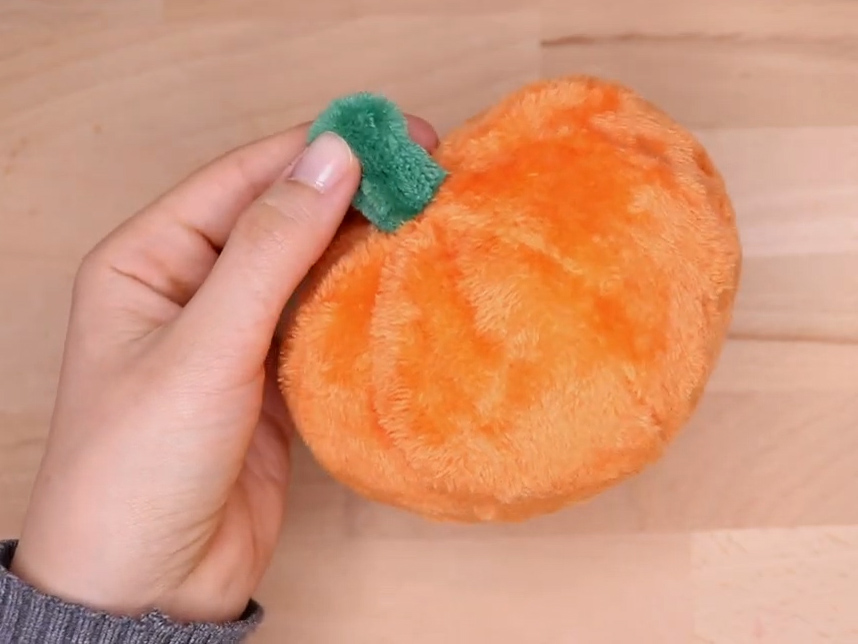
Place the stem on the top of the pumpkin. This way, you will be able to hide the knot you made when closing the opening of the pumpkin (image 1). Hold it in place using pins (image 2). Sew the stem, driving the needle through the pumpkin and through the stem, and make your way all around the stem (image 3). There you go! Your pumpkin is done (image 4).


PART I - BIS
Follow the first two steps of Part I, cutting four pieces out of the pattern. In this version, we will not sew the openings immediately. Start by pinning two pieces fur against fur (image 1) and sew along the dotted line (image 2). You end up with half of the pumpkin (image 3). Repeat the same step for the two remaining pieces. Place the two big, seamed pieces against one another, pin them and sew the outline without going through the top (image 4). You now have the body of the pumpkin in a single piece!


PART II - BIS
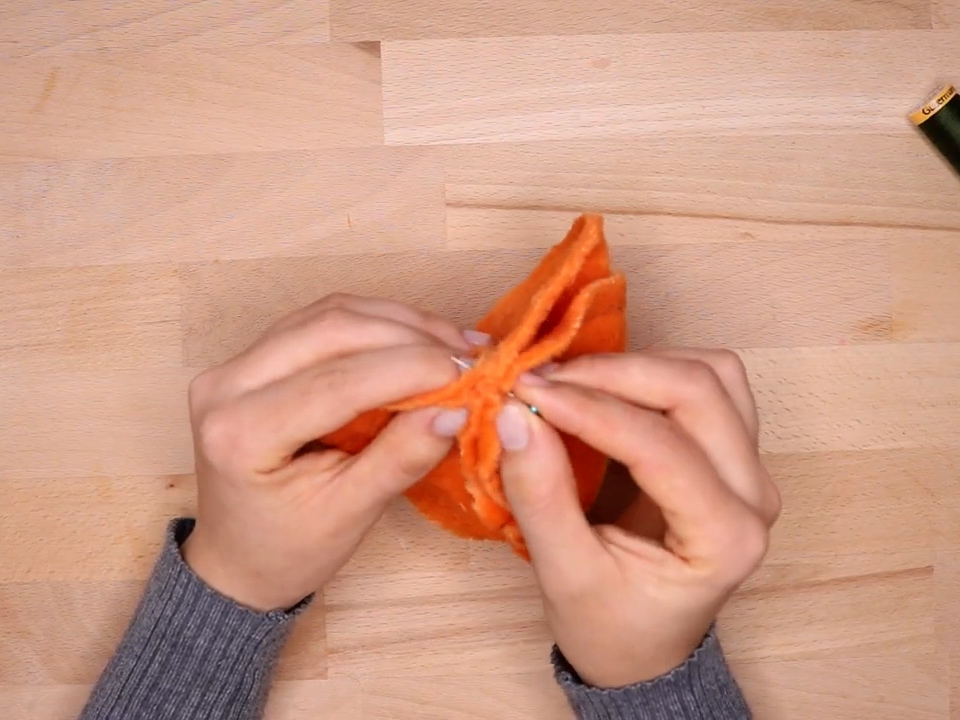
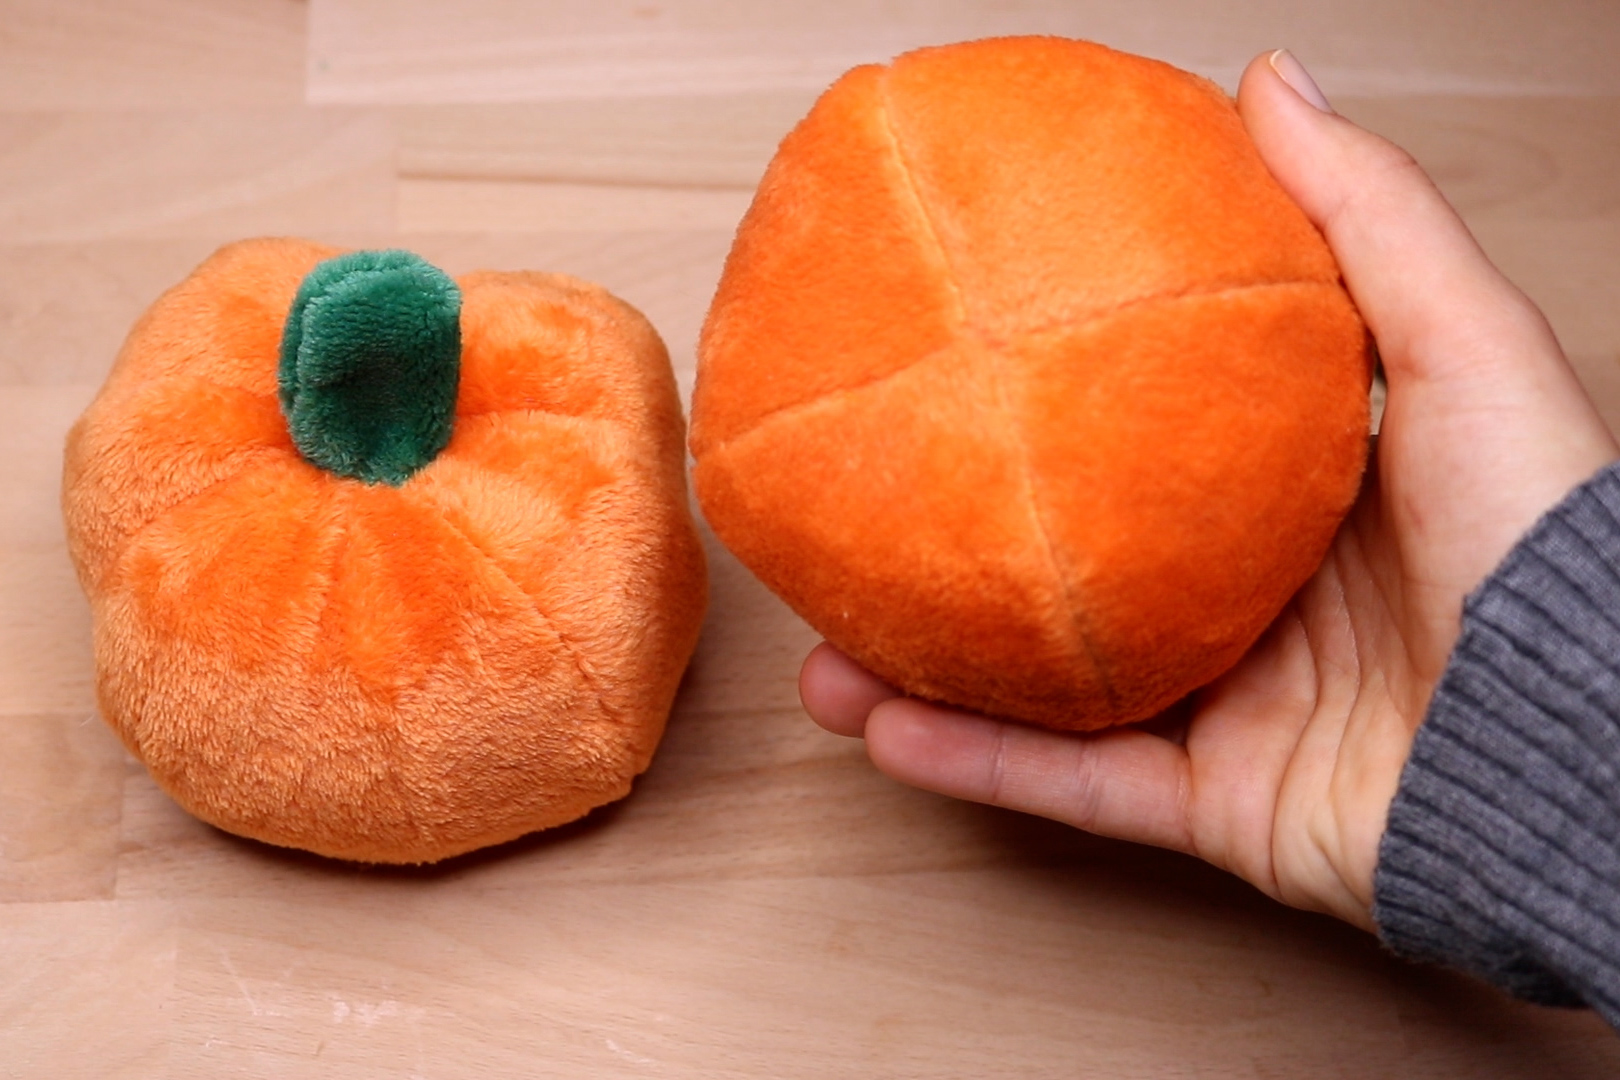
You can now close the openings (image 1) by connecting them to each other (image 2) but be careful to leave a small opening on the top. The pumpkin is ready to be stuffed (image 3)! At this stage, follow the same steps used for the round-shaped pumpkin, with parts IV (stuffing), V (making of the stem), and VI (attaching the steam). You should end up with a well-defined pumpkin (image 4).


There you go! Your pumpkins are ready for autumn 🎃

You can find the video of the making process below.
Do not hesitate to leave a comment below, you can even attach a photo of the pumpkins you made with this tutorial and this pattern 🎃
This is super cute, I was looking for a Halloween themed plushie to make for my dogs and this is perfect, super cute and looks easy enough. Will try it. Thanks a lot for the pattern ❤❤
this is so great! nice and helpful, thank you for sharing!
Thank you so much!!! You are wonderful!!!!!
Thank you! Very nice video! Going to make this pumpkin, you really inspired me, thank you again😊
This is awesome. I’m going to make a chair out of loads of these for next year
aaaaa so cute 💖